Set up Dashboard Builder
Who can do what
Dashboard Builder adds two levels under Settings > Users & Companies > Users, section Dashboards:
| Level | Can | Given by default to |
|---|---|---|
| User: view shared dashboards | Open the dashboards shared with them | Every internal user |
| Administrator: create and edit dashboards | Create, edit, share and delete dashboards and items | Settings administrators |
Figures are always computed with each person's own access rights and record rules. A sales rep who may only see their own orders sees the totals of their own orders, on the same dashboard as the manager.
Your first dashboard
After installing, open the Dashboards app. A sample Contacts overview dashboard is ready so you can try things out.
- Click the dashboard name at the top left, then New dashboard.
- Give it a name, for example Sales overview, and pick a Default period (for example This year). Save.
- Click Add and choose an item type, for example Tile.
- Choose the Model (Sales Order), a filter if needed, and what to measure (Sum of Untaxed Amount). Save.
- Add a Bar chart: same model, measure, and Group by Order Date by Month.
That is a working dashboard. The next page explains every option.
Share it
Open the dashboard menu (⋮ at the top right) > Dashboard settings.
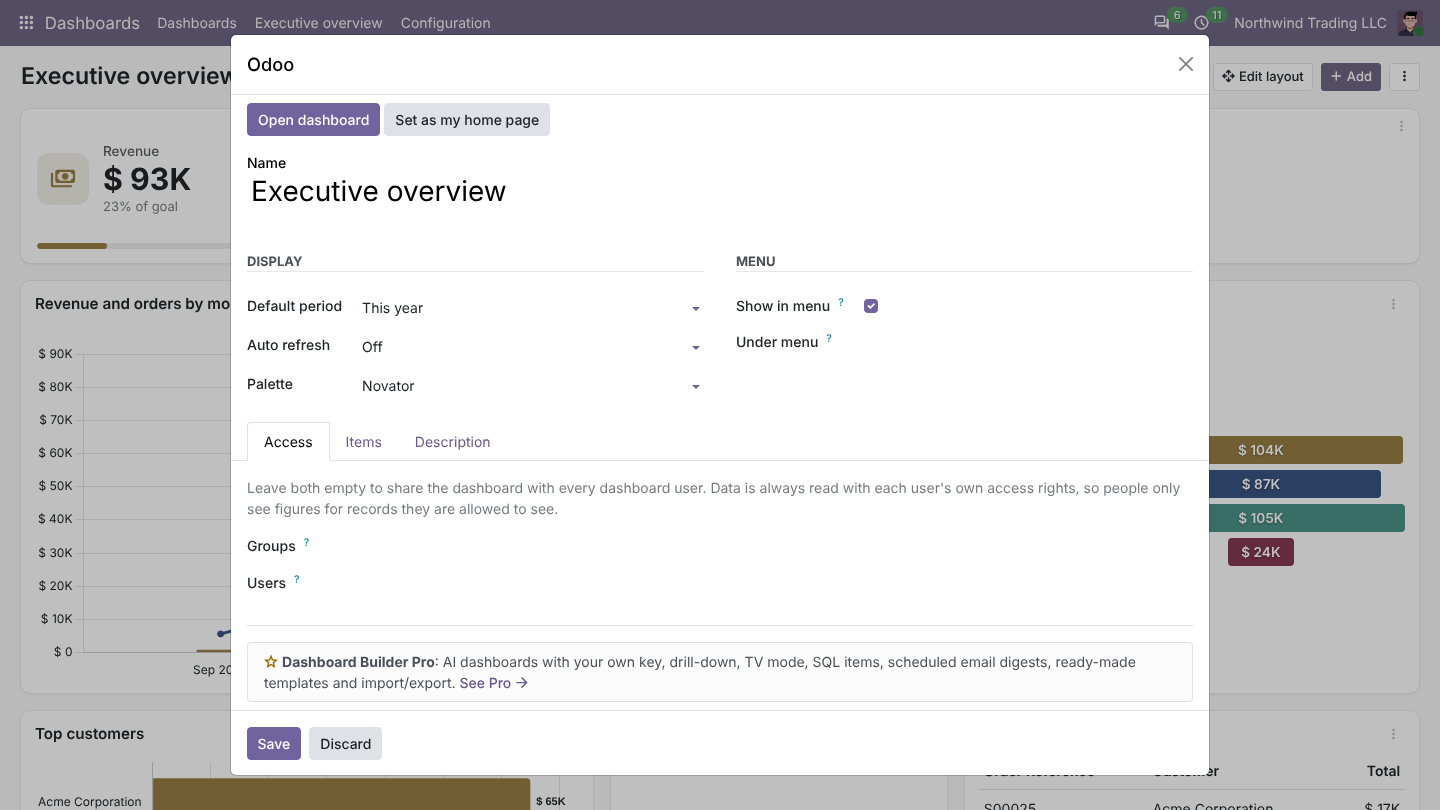
- Access: pick groups or users. Leave both empty to share with every dashboard user.
- Show in menu: adds a menu entry that opens the dashboard. Choose Under menu to place it in another app, for example in Sales > Reporting.
- Auto refresh: reloads the figures every 30 seconds to every hour, handy on a wall screen.
- Palette: the colours of the charts.
tip
Each user can make a dashboard their start page: ⋮ > Set as my home page. Odoo then opens it right after signing in.
Was this page helpful?